Google
 
Showing posts with label drawings. Show all posts

Friday, March 14, 2008

The Color of the Day is....Fuschia!

Ever heard the saying 'A rose by any other name is still a rose?' Well...pink by any other name is not Fuschia! There is just something exciting and at the same time, mind blowing, about this vibrant twist on the everyday pink. It's one of my personal favorites...you've no idea how many different styles of sweaters come in this color :)

Here is some totally awesome yarn coming from ThePaintedTiger's shop:
http://www.etsy.com/view_listing.php?listing_id=9749924

Photobucket

If you like the world of art, check out this masterpiece at keecojo's shop:
http://www.etsy.com/view_listing.php?listing_id=10150269

Photobucket

By all means check out this way cool ACEO from DianeClancy's shop:
http://www.etsy.com/view_listing.php?listing_id=9680341

Photobucket

Look at this awesome ceramic tile from martaharvey's shop:
http://www.etsy.com/view_listing.php?listing_id=10223643

Photobucket

While you're at it, go visit jillsfabricdesigns' shop and check out this adorable ballerina doll dress:
http://www.etsy.com/view_listing.php?listing_id=9443535

Photobucket

Now, as I said in my last post, my art lessons are on a kind of hiatus at the moment. I'm working on these little buggers.
Photobucket

Each one takes roughly 6 hours to make, if I stop for a drink of water now and then. If you are interested in friendship bracelets, check out my Etsy shop. I've got custom order bracelets there. http://AreYouAnArtist.etsy.com

Wednesday, March 12, 2008

The Color of the Day Is....Orange!

Hooray for Orange! Everybody loves orange. The leaves in the Fall...Orange popsicles...Orange juice...not to mention Oranges! Well, I love Orange too...and here are a few items from Etsy to show off today's color!

This is an adorable Cat Dog from amandajean's shop:
http://www.etsy.com/view_listing.php?listing_id=7415378


Check out this coooool mushroom and owl ACEO from gleepsie's shop:
http://www.etsy.com/view_listing.php?listing_id=9042714


Gotta love these coasters from BARL9758's shop:
http://www.etsy.com/view_listing.php?listing_id=10002735


Just look at this ADORABLE baby hat from LanaHandknitting's shop:
http://www.etsy.com/view_listing.php?listing_id=10065904


And don't pass by this elegant bracelet from ShyViolet's shop:
http://www.etsy.com/view_listing.php?listing_id=7481125


Now, I know I promised a new drawing lesson every time I posted a new color....but today I just can't. I'm right in the midst of an 'I want this done yesterday' order for 4 large and complicated friendship bracelets. I'll show them off when I'm finished. Until then...be sure to visit Etsy.com and have fun shopping!! (I know I do! lol)

Monday, March 10, 2008

The Color Of The Day Is....Brown!

Now, I think that brown has gotten a bad reputation of sorts. Mud, dead leaves, brown bagging it...But brown can be such a lovely color, and it will match almost anything, for any of you fashion minded folks out there. Take a look at these picks, and you will see what I mean.

This is an awesome looking artistic papercut design from bittystarr's shop:
http://www.etsy.com/view_listing.php?listing_id=9892800

Photobucket

This is a really neat looking felted Beagle pin from PitBullLadyDesign's shop:
http://www.etsy.com/view_listing.php?listing_id=9174246

Photobucket

Here is an awesome bar of soap from nordeasoaperie's shop:
http://www.etsy.com/view_listing.php?listing_id=9212970

Photobucket

This is a cool looking pyramid candle from the craftinator's shop:
http://www.etsy.com/view_listing.php?listing_id=9804295

Photobucket

And here is a very stylish purse from sheilascrafts' shop:
http://www.etsy.com/view_listing.php?listing_id=7652576

Photobucket

See! I told you brown was an awesome color!!

Now then...for those of you that read my post yesterday, I promised to talk about graphing to enlarge or reduce an image when drawing. For those of you who already know all there is about graphing and grids, be patient...not everyone does ;)

You will need the following:
ruler longer than your drawing surface, or a really good straight edge to go with the ruler
soft lead pencil with a sharp point - I use a good old 2b drawing pencil
white eraser - these erase well, and leave no colored marks behind like pink or other colored pencils do

Step 1:
Decide the finished size of your drawing. Will the subject fill the entire page? If the answer is yes, lucky you....skip to Step 2
If the answer is No, then decide on the placement of your main subject. You don't have to grid the entire drawing surface, just the area where you are placing it. What about the other elements of your drawing? Is your main subject going to be floating on the page? (Don't get me wrong, I love minimalist drawings...but perhaps a small patch of grass, or tree branch...something like that...should go in as well?) Are your secondary elements proportional on the reference material you are using to that of your main subject? If they are, GREAT...this will be a breeze. If not, that's okay too, because this really isn't that hard to do.

Step 2:
Decide how big or small all of your elements should be to make a great composition.
To Enlarge from the original, I like to go in increments that are easily multiplied. I use 1/4 to 1/2 inch grids on the original, and scale up to 1/2 or 1 inch on the drawing, depending on what the size is that I need. You can do more or less if necessary.
To Reduce from the original, once again I like to do it the easiest way possible for me. I use 1/2 to 1 inch grids on the original, and scale down to 1/2 or 1/4 inch on the drawing surface. You should use whichever size grid is easiest for you. I have a proportion wheel, but never use it :)

Step 3:
Making the grid on the drawing surface.
Tread lightly. You want to erase these lines later AND colored pencils pick up every dent in your drawing surface, leaving white lines behind if you aren't careful.
Make your grid by marking the intervals at the space you have decided. Do this about every 1/3 of the surface, making sure that you keep the ruler straight. Having the ruler off by 1/16 inch or more will through your grid out of square. Line up the marks with either your ruler or the straight edge and lightly draw the line.

Step 4:
Making the grid on your reference image.
These lines can be dark enough for you to easily see, but not so thick that they hide details. Make your grid just as you did in Step 3.

Step 5:
Now, draw what you see, using the grid as guides. If you start on grid A4 (or however you choose to name your columns and rows) be sure to start in grid A4 on your drawing surface...this saves alot of time erasing...trust me on this ;) I prefer to make a simple outline before laying down color, putting in just enough of the detail to be placeholders.

When you have finished drawing all that you want from the reference, erase the gridlines carefully from your drawing surface.

See how easy that is? Okay...an art projector would be MUCH easier, but who can afford one of those??!

Okay....stay tuned for another exciting installment of 'How to Get Realistic Effects With Colored Pencils Without Losing Your Sanity'

Sunday, March 9, 2008

The Color of the Day is....Purple!

Well, all right then. I haven't been on the ball this week, for which I feel quite ashamed of myself. I can't get the word out about Etsy and its wonderful community of crafters if I don't make a more serious effort, can I?

Today, it's all about Purple! Lots of cool stuff out there comes in shades of purple...purple mountains majesty...purple people eaters...you know, stuff like that :)

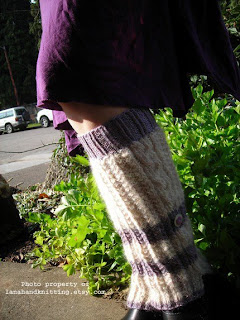
Here is a great purple and cream pair of leg warmers from LanaHandknitting's shop:

http://www.etsy.com/view_listing.php?listing_id=9709761


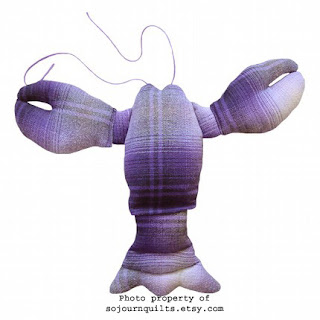
Here is a wonderful flannel lobster from sojournquilts' shop:
http://www.etsy.com/view_listing.php?listing_id=6145251


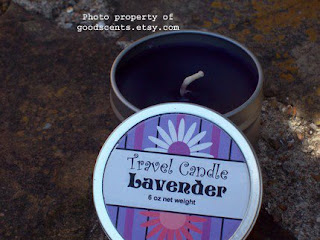
This is an exceptional lavender travel candle from GoodScents' shop:
http://www.etsy.com/view_listing.php?listing_id=8911362


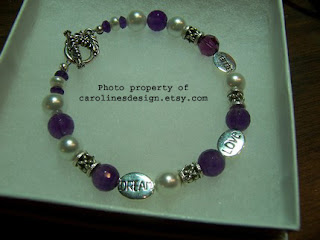
This beautiful inspiration bracelet is from carolinesdesign's shop:
http://www.etsy.com/view_listing.php?listing_id=9931776


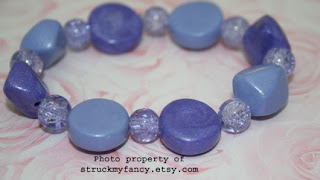
And last for today, but definitely not least, is a beautiful bracelet from struckmyfancy's shop:
http://www.etsy.com/view_listing.php?listing_id=10035140


I also intended at the start to give tips on drawing with colored pencils. There are so many styles and techniques that I feel a bit overwhelmed with this task. I do that more than I should...think too hard about something and make it larger than it should be. So I made myself rethink my original idea. Obviously, I can't teach anyone something that I don't know how to do, right? So here goes...

The very first thing one should do when they want to create a masterpiece is decide on the subject matter. To draw a realistic looking piece of art, you must have a very good reference, whether that means drawing it out on the spot, or using reference photos as I do. If you use reference photos, be sure that they are clean and crisp so you can see the details, or at least know your subject well enough to be able to make an educated guess on something that doesn't show up well in your photo. I take my digital camera with me everywhere...and I mean everywhere. I've got hundreds of reference pictures saved to disc that I print out on my inkjet printer.
Proportion is everything when it comes to realistic drawings. I prefer to sketch from the photo I've taken, but if I need to make my main subject larger or smaller, I'm not against graphing off my picture and my drawing surface. I'll get more into that in my next blog.

What kind of colored pencils to use? That one is easy! Whichever kind you want to use. Some are softer than others, and blend more easily, but because of that, it is more difficult to get a crisp, sharp edge. (I didn't say impossible, just more difficult) If you are on an unlimited budget and money is not a factor, buy the best you can. Prismacolor is just one of the many great, yet expensive, colored pencils out there. I happen to be a starving artist, so Crayola is my pencil of choice. They have harder leads, but with practice can be manipulated quite well. On the down side, they will accept fewer layers without getting 'muddy'.

Colored pencils need a surface with some tooth to it. Rough artist paper is a good choice. Rough illustration board is more costly, but well worth the investment. Pencils must be layered at times, and maneuvered in other ways, and while artist drawing paper is good for a few layers, it does flatten out and get a 'warp' to it's surface if you push it too far. Illustration board is more forgiving than a mother is to a wayward child. Again, that starving artist rears its ugly head, so I draw with acid free artist drawing paper.

When it comes to sharpening my pencils, I love my handy dandy electric pencil sharpener, but it doesn't play well with the softer leaded pencils such as Prismacolor...so I keep a good hand held pencil sharpener in my art bin as well. Mine has a removable stainless steel blade that I can remove and put an edge on if necessary. The cheaper plastic ones from the dime store are not recommended for quality pencils, as you have to twist the pencil to get them to sharpen, which will most likely break the lead inside the wood casing.

If you are outlining with your pencil, get as sharp of a point as you can, using care not to press too hard on your drawing surface at first. This also helps get that crisp edge. If you are laying down wide areas of color, use the side of the pencil, laying it more horizontal to the paper. (yeah, I know...everyone knows that, don't they?)

Well, that is going to have to do you for now. Stay tuned for my next exciting installment of 'How to Get Realistic Effects With Colored Pencils Without Losing Your Sanity'

Friday, February 29, 2008

Welcome to The Art of Color!

Wow...How exciting! My very first Blog!

Now what?....Well, I decided to start this blog to promote a great site called Etsy. It really is a place to buy and sell all things hand made. There are currently over 100,000 shops there with wonderful items made by very talented artisans and crafters!

I'm going to make this a multi-tasking blog. 1st - I will promote certain Etsy shops based on the primary color of an item in their listings. 2nd - I will have basic lessons on the techniques I use in my drawings and paintings. Hopefully, I can get in here daily, but I can't promise it. So, while you are waiting for my first installment, check out the items I have in my own Etsy shop at http://AreYouAnArtist.etsy.com I know you'll like them!